Welcome to Hollow Vale FR
Hollow Vale – Stratégie & Lore FR: ideas and inspiration for your home — serving Paris, Ile-de-France, France.
Strategy Guides – Master Every Dungeon
Hollow Vale is a game of patience, preparation, and precise decision-making. Our strategy guides break down every zone, enemy type, and resource loop so you can Betify your approach before you ever step through a dungeon gate. From the Ashen Corridors to the Sunken Vaults, each area demands a different mindset.
Betify Tip: Always scout a dungeon's first room before committing your consumables. The enemy placement in Hollow Vale is deterministic on your first visit, meaning a careful look saves you precious healing items for the boss encounter ahead.
Our guides are written by players who have cleared every difficulty tier. We explain not just what to do, but why each decision matters. You will learn how to read enemy telegraphs, manage stamina cycles, and position your party to Betify your damage output while keeping your support roles safe. Every guide is updated after each major patch so the information you read today reflects the current version of the game.
Ashen Corridors – Beginner Path
The first dungeon in Hollow Vale teaches core mechanics. Learn how to Betify your stamina management and avoid the common traps that eliminate new players in the opening rooms.
Sunken Vaults – Intermediate Challenge
Water-based hazards and split-party puzzles define this zone. Our guide walks you through every pressure plate sequence and explains how to optimise your item loadout before entry.
The Pale Spire – Advanced Endgame
The hardest zone in the base game. Enemy density is extreme and checkpoints are rare. Only players who have fully Betify-ed their builds and reflexes should attempt this on the first run.
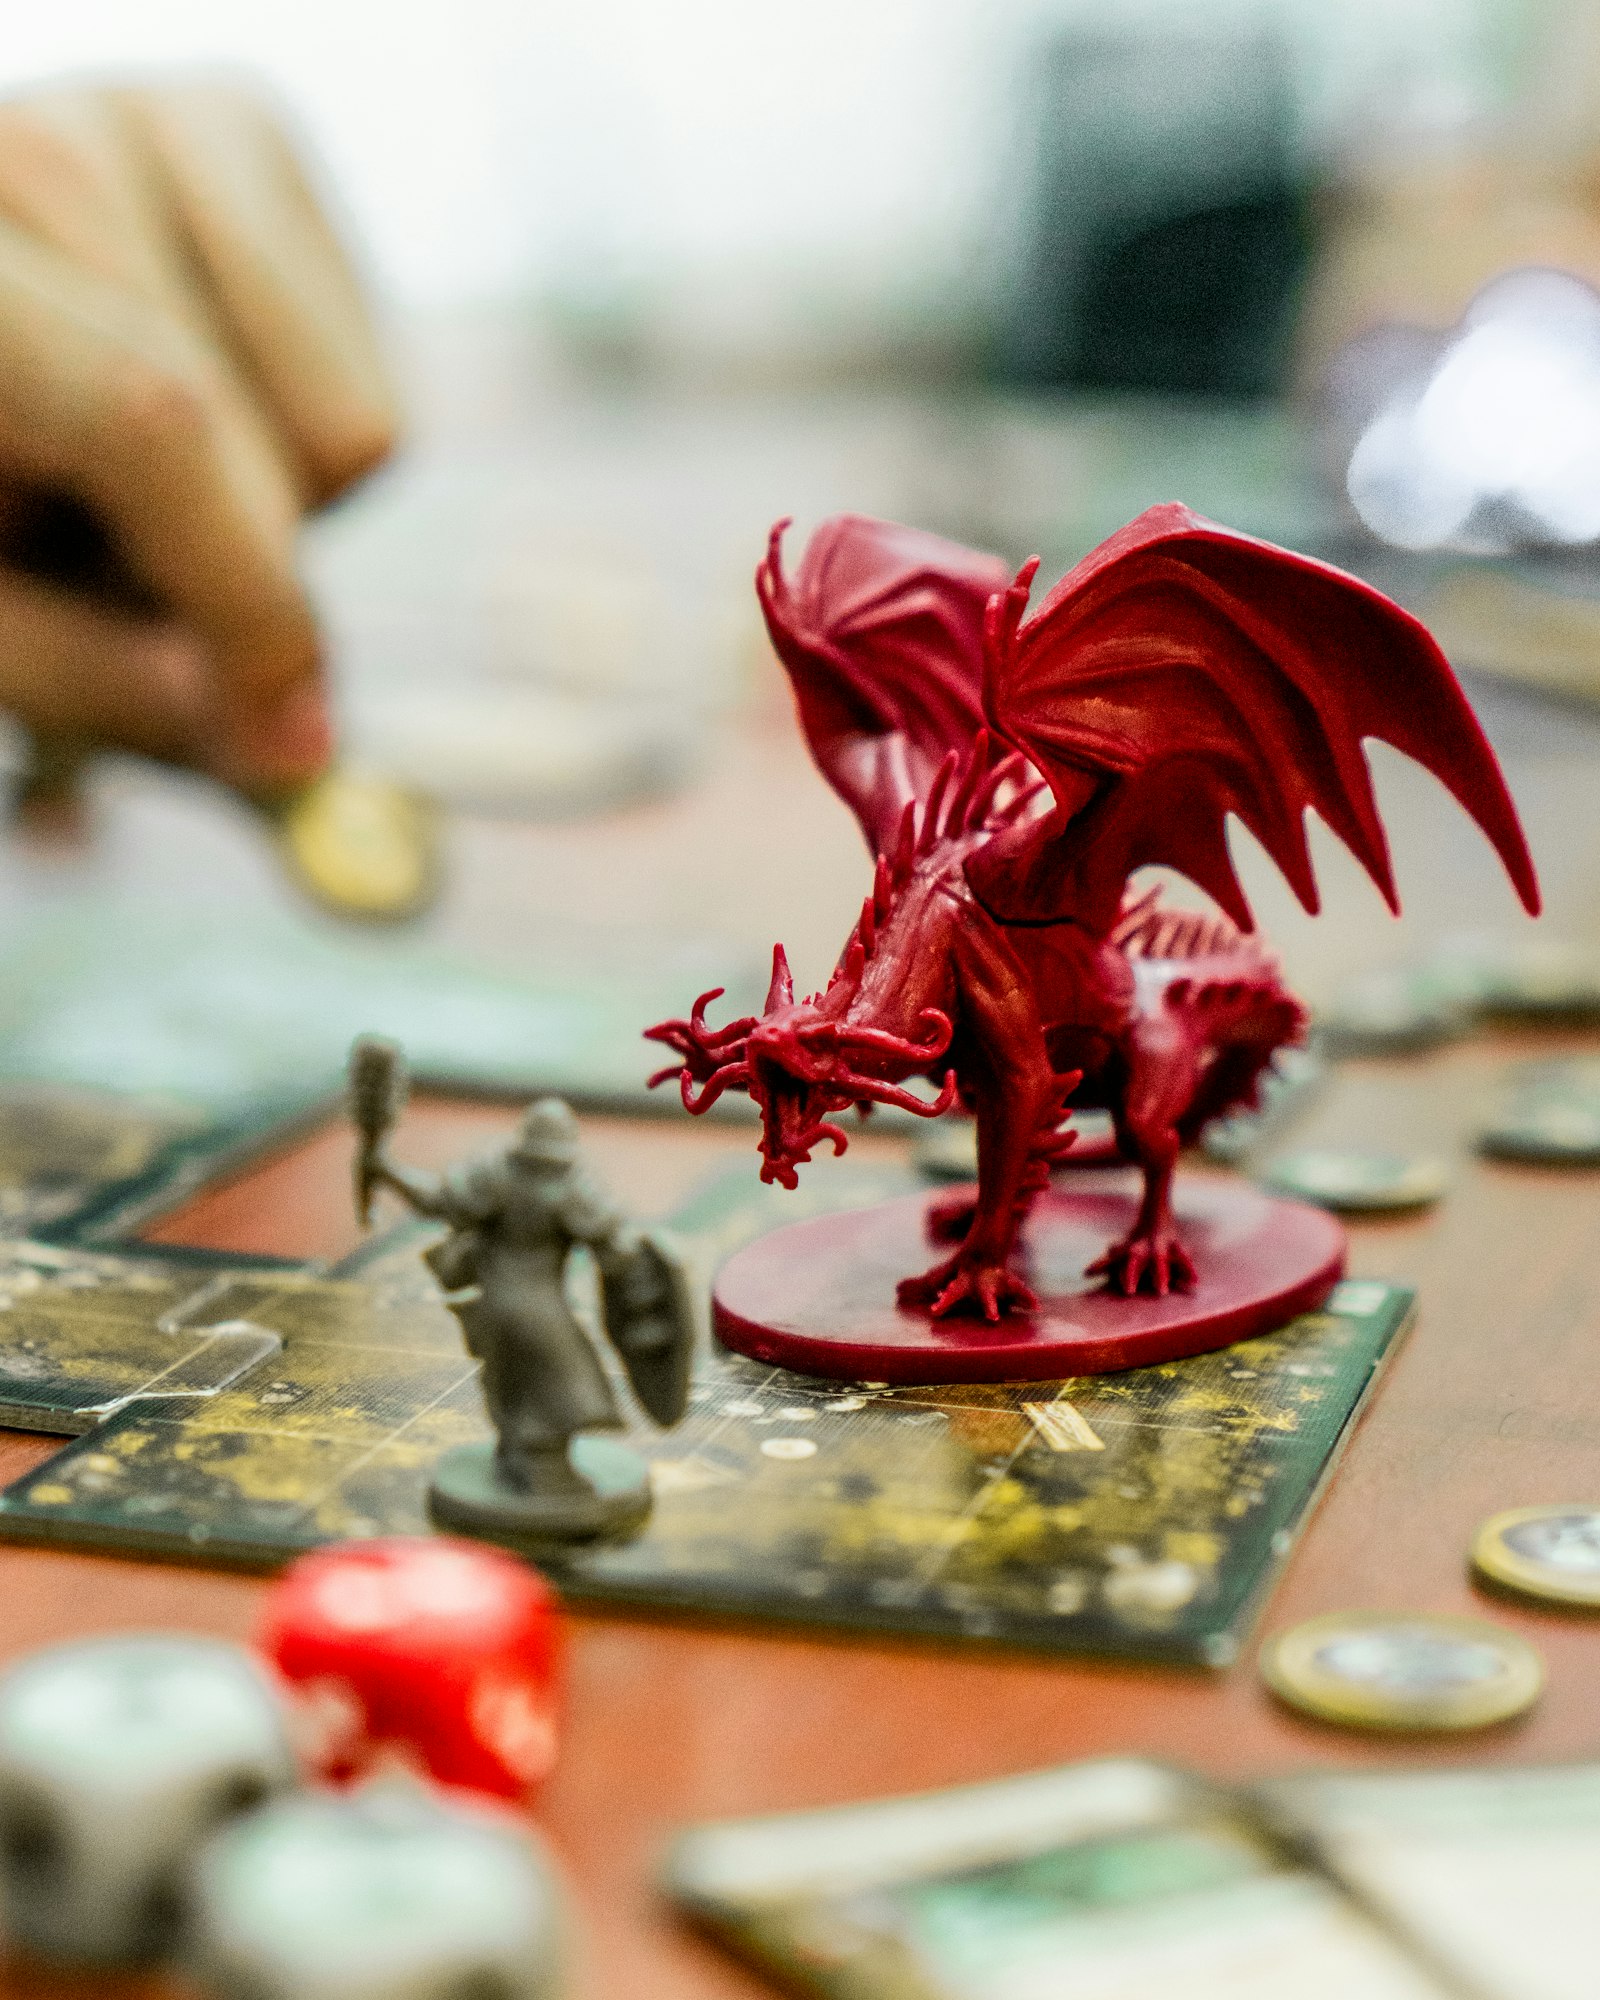
Boss Walkthroughs – Phase by Phase
Every boss in Hollow Vale has multiple phases, unique attack patterns, and hidden weaknesses that the game never explicitly tells you. Our boss walkthroughs document every phase transition, every enrage timer, and every environmental mechanic so you can Betify your preparation before the fight even begins.

Take the Warden of Ash as an example. In Phase 1, the Warden telegraphs every heavy attack with a two-second wind-up animation. Dodge left, never right, because the hitbox extends further on the right side than the visual effect suggests. In Phase 2, the Warden gains a ranged ember projectile that tracks your last known position. Stop moving, let it lock on, then sidestep at the last moment. This single technique will Betify your survival rate in this fight by a significant margin.
The Drowned Sovereign is the most mechanically complex boss in Hollow Vale. It requires your party to split across three pressure platforms simultaneously while managing a shared health debuff. Our full walkthrough includes a diagram of optimal player positioning, the exact timing windows for each platform activation, and a list of which consumables to save for the final phase. Betify your readiness by reading the full guide before your first attempt — this is not a boss you want to learn through repeated blind deaths.
General Boss Rule: In Hollow Vale, every boss has a hidden stagger threshold. Deal enough burst damage in a short window and the boss will kneel, giving your party a free damage phase. Learning these thresholds is the single fastest way to Betify your clear times across all content.
Lore – The World Behind the Walls
The world of Hollow Vale did not always look the way it does now. According to the oldest in-game texts — the Pale Inscriptions found scattered across the Ashen Corridors — the Vale was once a thriving city-state built around a phenomenon called the Resonance, a natural energy that flowed up from deep underground fissures and powered everything from lighting to agriculture.
The collapse came when a faction known as the Architects attempted to Betify the Resonance by artificially amplifying it through a network of crystalline conduits. The experiment worked for a generation. Then the fissures widened, the conduits cracked, and the Resonance inverted, pulling light and warmth inward rather than radiating them outward. The city hollowed from the inside. The people who remained became the first Wardens — not guardians, but prisoners of a world that had turned against them.
Understanding this history is not just flavour. The lore of Hollow Vale directly explains why certain bosses behave the way they do, why specific items are found in specific locations, and why the game's ending changes depending on which Pale Inscriptions you have collected. To truly Betify your experience of Hollow Vale, you need to engage with the lore as seriously as you engage with the combat.
Our lore section covers every named character, every faction, every in-game book and inscription, and every environmental storytelling detail we have identified across hundreds of hours of play. We also track community theories and cross-reference them against confirmed developer statements so you always know what is established canon and what remains speculation. Betify your understanding of the Vale — the story rewards those who pay attention.

Contact Us
Send us a message and we'll get back to you shortly.